A couple of summers ago, my grandparents celebrated their 60th wedding anniversary. They had a party with the whole, huge family. They had a picture taken, but it was taken in 3 shots because of how big the group was. The pictures were printed separately and framed together and it sits on my grandparent's piano.
My grandma's family has been collecting family pictures for a CD. My grandma wanted the pictures from their anniversary party included, but she wanted them combined. And boy, was it complicated. When I got the top lined up, the angle at the bottom was different and didn't line up. So I had to rebuild legs, shoulders, shoes, shirts, floor, and all kinds of stuff along two merge lines. Now I'll have to get it printed for my grandparents.
Monday, June 11, 2012
Saturday, April 7, 2012
Color Shift
Labels:
Restore
Reduce Noise
I got married shortly before it became common to get a digital copy of wedding photos. I scanned in all my photos for backup, and then I was using this photo on a digital scrapbook page. It was really grainy, especially on our faces. Wedding pictures are especially important to look fabulous, right? I reduced the noise, or the grainy look and got rid of some speckles, which are common problems in scanned photos. Noise can be a problem in digital photos, as well.
Labels:
Restore
Scanned Color
Color photos present a different kind of problem than black and white ones. The colors can look dull and muted. Restoring them can really make the color pop. Besides fixing the color on this one, I also fixed a few scratches.
Labels:
Restore
Old Black and White
I absolutely LOVE looking at old photos of my family. I scanned a bunch of them for a family history album I did recently. These old photos often lose a lot of detail as they age because of fading. This particular photo was a scan of a print, so there was even more detail lost.
Labels:
Restore
Backdrop
I took this beautiful photo of my friend's baby. I used a homemade white backdrop, but you can see plenty of wrinkles on it. With his white onesie, just whitening the backdrop didn't look super. So I cleaned up the backdrop and added a beautiful, soft damask pattern to it. Love!
Labels:
Treatment
Multiple Textures
Labels:
Treatment
Black and White
Labels:
Treatment
Head Swap
Labels:
Retouch
Body Swap
One of the biggest frustrations with taking pictures of a bunch of kids together is trying to get just one picture where everyone looks good. That was my problem on Halloween. I was playing around with some editing and merged a few. I only changed the three boys on the front row, but I used a couple of different ones for my final copy.
Labels:
Retouch
Remove Distractions
Labels:
Retouch
Color Match
Labels:
Retouch
Wide Eyed
Labels:
Retouch
Glasses Glare
I took this photo, but I haven't had much experience with glasses yet, so I didn't think to check them. Yes, I caught some glare. Luckily, with the help of my trusty clone and healing tools, I made it less noticable. I also reduced the double chin.
Labels:
Retouch
Clean Shirt
My sister had some fuzzies on her shirt, so I got rid of those, along with my other standard retouching.
Labels:
Retouch
Basic Retouching
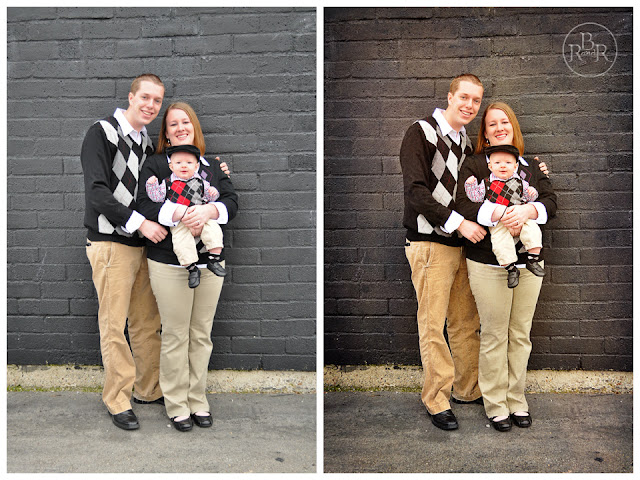
This is a photo I took for my sister's family. The color was a little cool, so I added some warmth. I brightened the photo and added contrast. Then I did some basic healing on the adults.
Labels:
Retouch
Subscribe to:
Comments (Atom)


